
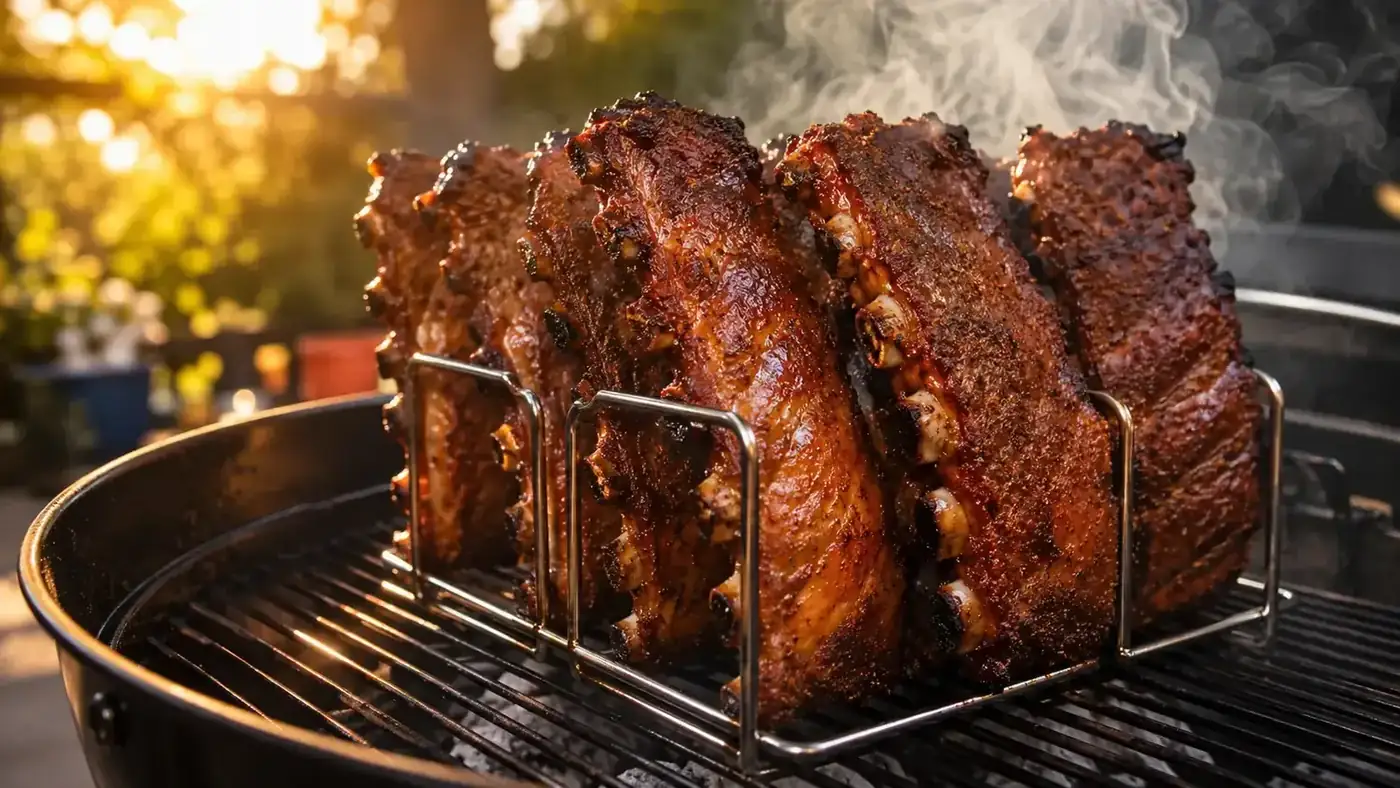
My dad cooked ribs flat on the grate for thirty years and swore it was the only way. I did the same thing for the first decade after I took over the grill. One Memorial Day I had six adults and four kids showing up in four hours, two racks of baby backs, and a gas grill that was never going to hold everything flat. I shoved the ribs upright into a cheap wire rack I found at the back of the cabinet and crossed my fingers. The bark was better than anything we had ever made flat. That was the moment I started paying attention to rib racks.
I picked up the ACMETOP Extra Long Stainless Steel Rib Rack early in the spring and ran it through every cookout from April through the end of September. Memorial Day, Fourth of July, Labor Day, two birthday parties, and a dozen Sunday rib nights in between. Here is everything I learned after six months of standing ribs up on both a gas grill and a charcoal kettle.
The Quick Verdict
Solid, heavy stainless rack that actually fits three full racks of ribs without crowding them, cleans up in ten minutes, and survives a season of hard charcoal use without rusting or warping.
Amazon Check Today's Price →Six months of Sunday rib nights later, this is the only rack in my cabinet
The ACMETOP rib rack costs less than a tank of propane and it will fundamentally change how your ribs cook. Over 3,300 backyard cooks agree on Amazon, and so do I.
Amazon Check Today's Price on Amazon →How I Used It All Season
My main grill is a three-burner gas grill I have had for eight years. It is not fancy but it holds temperature well if I keep one burner off for indirect cooking. I also run a 22-inch charcoal kettle when I want real smoke for company. I used the ACMETOP rack on both grills, on separate cooks, at least twice a month across the season. Most cooks were baby back ribs, but I also did two cooks of St. Louis spares and one full rack of beef back ribs just to see how the fit held.
My standard method is a dry rub the night before, three hours of indirect heat at around 250 degrees, then a tight foil wrap with a little apple juice for 45 minutes, then unwrapped for the last half hour to set the bark. I did not change that process at all when I switched to the rack. The only thing that changed was standing the ribs up instead of laying them flat. Everything else stayed the same so I could see what the rack itself was actually doing.
By mid-summer I started getting comfortable enough to try two-zone charcoal setups with the kettle and a handful of hickory chunks. The rack held rock-steady on the grate even when I was moving the lid on and off every half hour to manage temperature. That stability matters more than I expected it to. A rack that wobbles or tips mid-cook is genuinely dangerous when you are working near live charcoal, and this one never gave me a moment of concern about that.
Build Quality and What It Feels Like in Your Hand
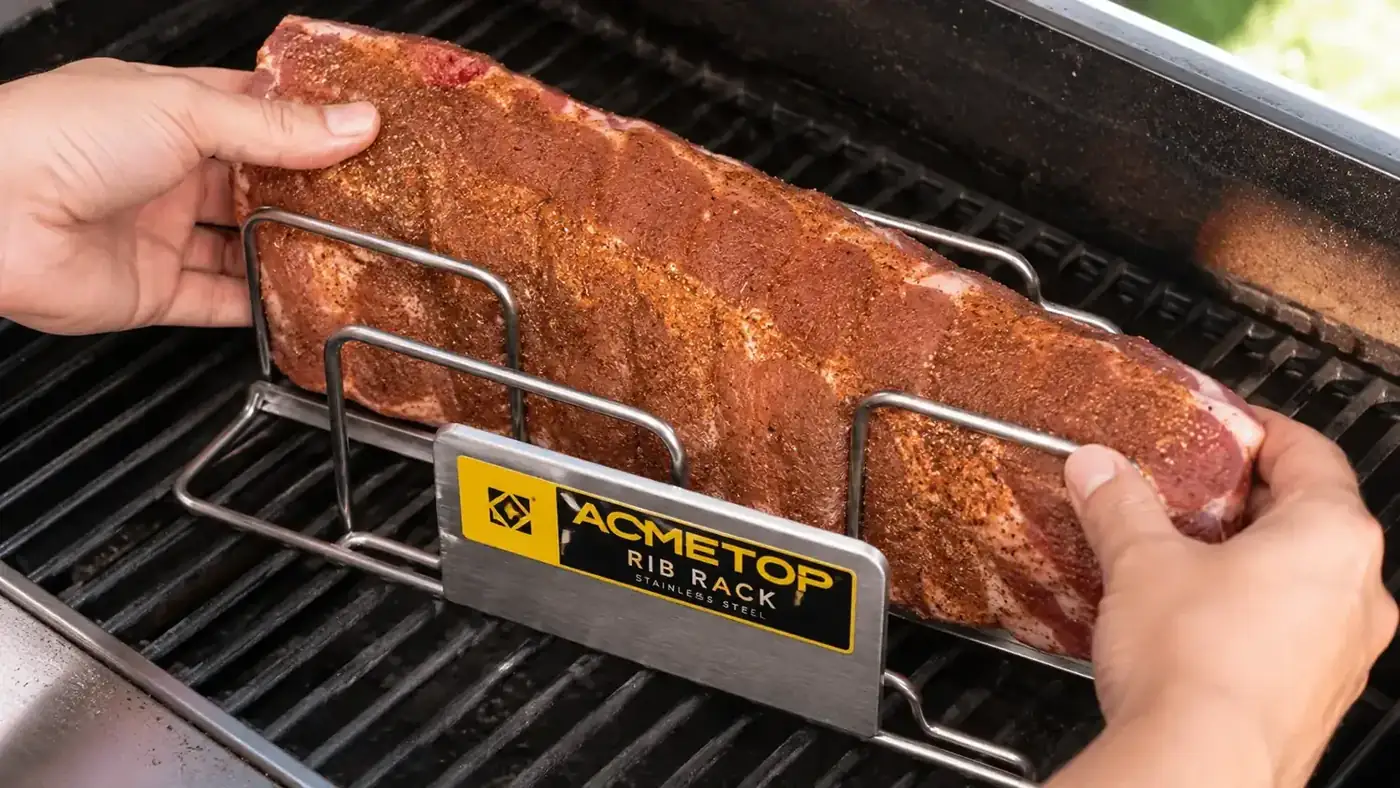
The ACMETOP rack is made from 304 stainless steel and it feels substantial right out of the box. The base sits flat on the grate without wobbling. The slots are wide enough to slide a rack in without having to fight it and close enough together that the ribs stay upright on their own once you load them in. The whole thing weighs just over a pound, which sounds light but it sits heavy enough that I have never had it tip over even when pulling one rack out while the other two are still loaded.
After six months of use, including a few cooks where I let it run hot chasing a bark I liked, I see zero rust. The welds at the base corners look exactly like they did in April. I did one cook where I forgot it on the grate overnight and it rained. I expected some surface rust by morning but it wiped off clean with a paper towel. That tells me the 304 stainless claim is not marketing.
The one thing I will note is that the edges of the slots have a slight sharpness to them. Not enough to cut you if you are careful, but you want to handle it with the same attention you give any sharp kitchen tool. Rinse your hands before grabbing a rib off it mid-cook and you will be fine.
Smoke Penetration: The Real Reason to Stand Ribs Up
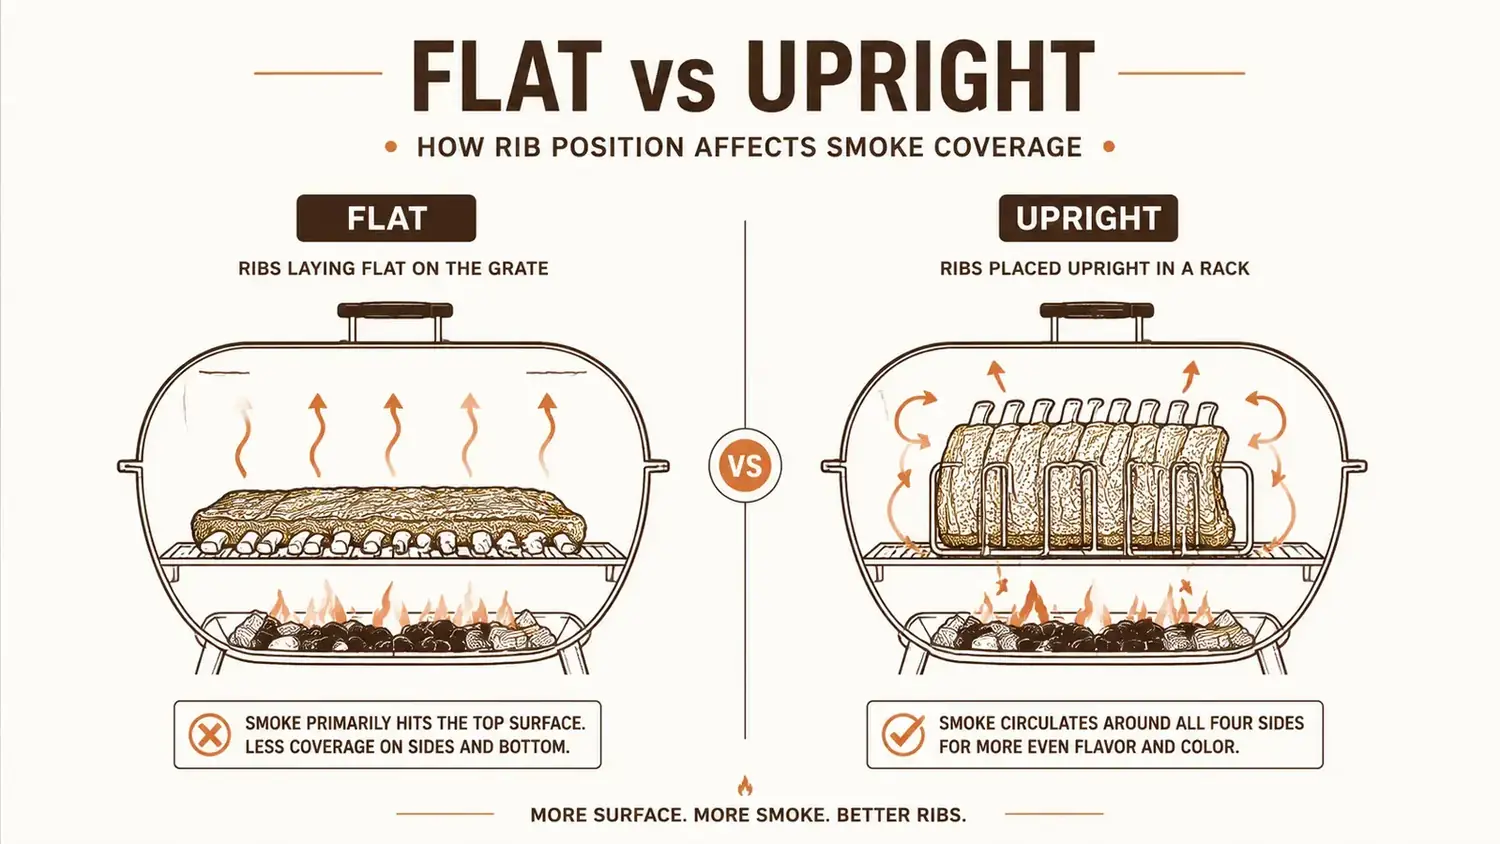
This is the part that actually converted me. When ribs lay flat on the grate, the bone side sits against the grate and takes all the direct heat. The meat side faces up and gets the convective heat. The edges get almost nothing. When you stand the ribs up in a rack, every surface of the rib, the meat side, the bone side, both edges, gets full exposure to the circulating smoke and heat at the same time. The result is a more even smoke ring and a bark that forms on all sides instead of just the top.
I noticed this most clearly on the second cook of the season when I ran two half-racks side by side on the charcoal kettle, one flat and one in the rack. The flat half-rack had a good smoke ring on the meat side and almost nothing on the bone side. The rack half-rack had a smoke ring that wrapped all the way around. The bark was deeper on all four sides. That was enough to convince me. If you want the full breakdown of standing ribs up versus the classic foil wrap approach, I wrote a separate piece on the rib rack vs foil wrap method that gets into the details.
Standing ribs upright is not a trick. It is just physics. Smoke can only reach what it can actually get to.
Capacity: Does It Really Hold Three Full Racks?
The ACMETOP is listed as holding up to three full racks and in my experience that claim holds, with a caveat. Three full racks of baby backs fit comfortably with about an inch of space between each one. That spacing matters because if the ribs are pressed against each other, the contact points steam instead of smoke and you get pale spots on the bark. Three racks of St. Louis spares is a tighter fit because the slabs are wider. I found that two full St. Louis racks and one baby back works better than three St. Louis slabs crammed in.
On a 22-inch kettle, three full racks upright in this rack takes up roughly the same grate real estate as one and a half racks flat. That freed up space on the left side of my kettle for corn and a small cast-iron pan of beans. That capacity multiplication is genuinely useful when you are cooking for a crowd and every inch of grate counts.
Gas Grill vs Charcoal: Does It Matter Which You Use?
I used the rack on both my gas grill and my charcoal kettle and there is a real difference in the results, though none of it is the rack's fault. On gas, the smoke is lighter because I am relying on a small foil packet of wood chips rather than real wood chunks. The upright position still helps with even cooking and bark formation, but the smoke ring is thinner. On charcoal with hickory chunks, the upright position makes a significant difference in the smoke ring depth because there is so much more smoke circulating.
The rack itself performs identically on both surfaces. The stability on a gas grill grate is the same as on a charcoal grate. There is no sliding around and no tipping. If you only have a gas grill and you want better ribs, the rack will still help. If you cook on charcoal, the improvement is even more noticeable. I also put together a full step-by-step guide on how to smoke ribs standing upright on any grill if you want the complete setup process rather than just the gear review.
One thing I noticed on my gas grill: the rack positions the bottom edges of the ribs close to the grate, which means if you have a hot spot in your gas grill, the very bottom of the ribs can overcook slightly before the rest catches up. I solved this by rotating the rack 180 degrees halfway through the cook, the same way you rotate a cake pan in an uneven oven. Takes ten seconds and eliminates the problem.
Cleanup After the Cook
After a full rib cook, the rack has a solid coating of rendered fat, bark drippings, and smoke residue. This is not a tool you wipe down with a paper towel and call done. I soak mine in hot soapy water for about ten minutes after every use, then scrub with a stiff brush. The stainless releases the grease without needing anything abrasive. Total cleanup time is under ten minutes even after the worst cooks. I have run it through the dishwasher twice and it survived both cycles without any discoloration or warping, though I prefer the hand wash because it is actually faster for me.
After six months of cleaning, the finish looks the same as it did new. No pitting, no staining that does not wash off, no rust. This is one area where buying a name-brand 304 stainless rack over a cheap chrome-plated version makes a real difference. Chrome plating chips and rusts. Stainless does not.
What I Liked
- Genuine 304 stainless holds up to a full season of hard use without rust or warping
- Fits three full racks of baby backs with enough spacing to prevent steaming at contact points
- Dramatically improves smoke ring and bark formation on all four sides of the rib
- Frees up significant grate space compared to laying ribs flat
- Easy ten-minute cleanup, dishwasher safe in a pinch
- Stable on both gas grill grates and charcoal grill grates without tipping
Where It Falls Short
- Slot edges have a slight sharpness that requires careful handling, especially when wet
- Three full St. Louis spare rib slabs is a very tight fit, two St. Louis plus one baby back works better
- Very bottom edges of ribs can overcook on gas grills with hot spots if you do not rotate mid-cook
Who This Is For
This rack is built for the backyard cook who does ribs at least a few times per season and wants better results without changing their process. If you already have a method you like, the rub, the timing, the sauce situation, you do not have to change any of it. You just change the orientation of the ribs. The improvement in smoke penetration and bark is real and repeatable. If you are cooking for a crowd and running out of grill space, the capacity advantage alone justifies the buy. It is also the right choice for anyone who has gotten frustrated with ribs flopping over and losing their shape mid-cook, which happened to me more times than I want to admit before I had a rack.
Who Should Skip It
If you only cook ribs once a year and you are fine with your flat results, this is probably not a purchase you need to rush. It is also not the right tool if you are doing the 3-2-1 method where you wrap in foil for the full second phase and then finish flat on the grate, because the wrapping step works better with the ribs horizontal. I still use the rack for the unwrapped phases and lay them flat for the foil phase, which means I am getting the setup and put-away for both, though it is not a big deal. And if your grill grate has very wide spacing, double-check that the base of the rack spans enough bars to sit level before buying, though this has not been a problem on either of my grills.
Ready to stop laying ribs flat and start getting bark on all four sides?
The ACMETOP rib rack is rated 4.6 stars across more than 3,300 Amazon reviews and it is priced around the same as a good bottle of BBQ sauce. If you cook ribs more than twice a year, it will pay for itself in better results the first time you use it. I have used mine at least twenty times now and it has never let me down.
Amazon Check Today's Price on Amazon →