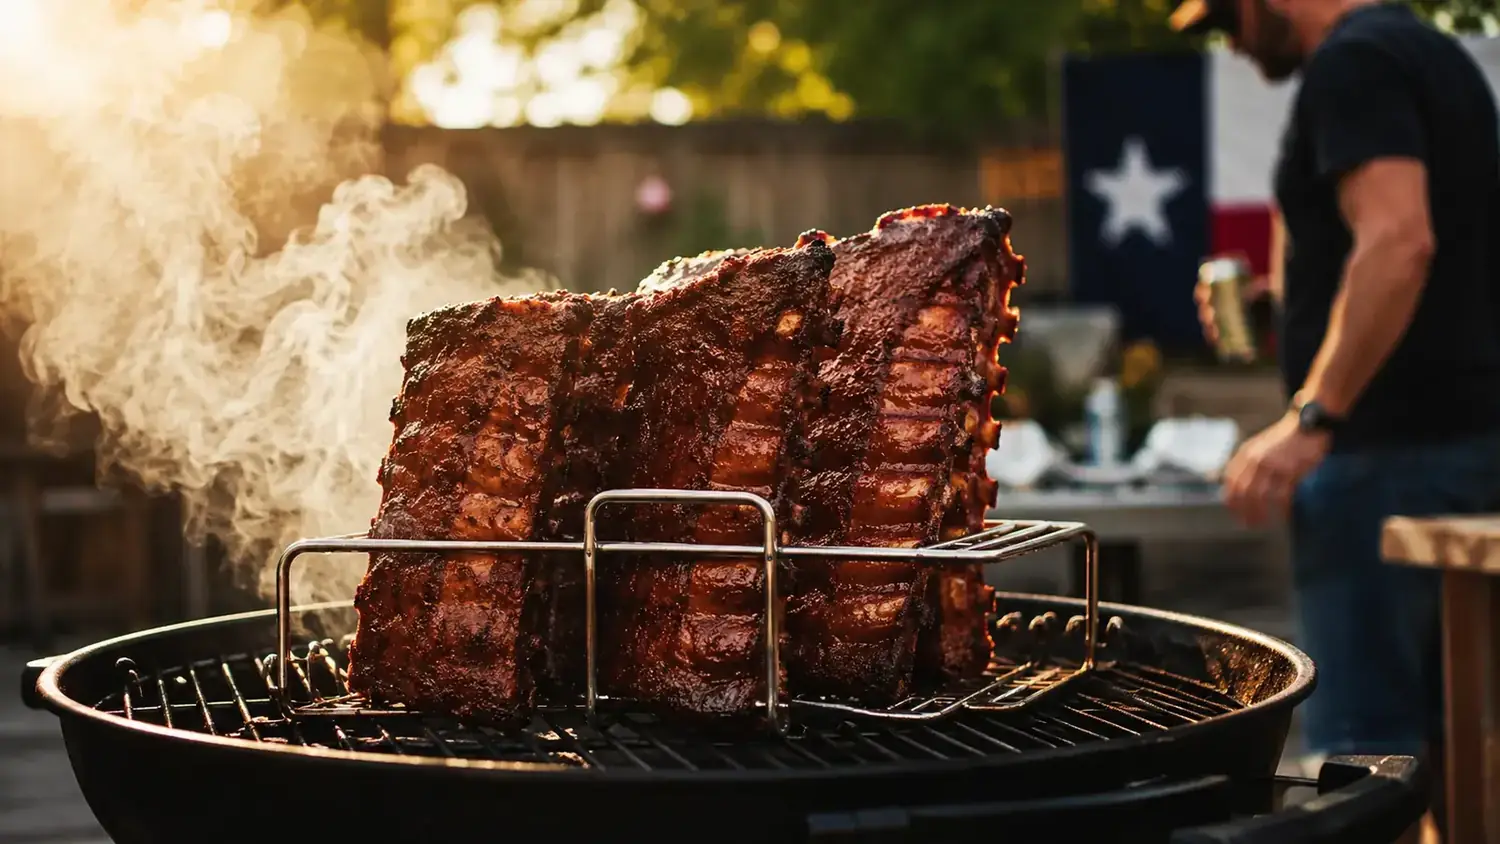
The first time I tried smoking ribs flat on a grill grate, I ended up with three things: one batch of overcooked ends, one batch of undercooked centers, and a lid I could barely close over the mess. My dad never had this problem because he had a big offset smoker with actual room to work. I was on a 22-inch kettle trying to feed eight people, and I had about half the real estate I needed. Then I started standing the ribs upright in a stainless steel rib rack, and my whole approach changed.
Standing ribs upright in a rib rack solves three problems at once: it fits more racks into the same footprint, it exposes both sides of each rack to circulating smoke instead of trapping one side against the grate, and it keeps the meat out of direct radiant heat so it can cook low and slow without scorching. This guide walks through every step from membrane removal to the bend test, so you can pull it off on any gas or charcoal grill you own.
Before you fire up the grill, make sure you have the right rack for the job.
The ACMETOP Extra Long Stainless Steel Rib Rack holds up to three full racks upright and fits most standard 22-inch kettles and mid-size gas grills. It's the tool this whole guide is built around.
Amazon Check Today's Price on Amazon →Step 1: Prep Your Ribs the Night Before (or at Least Two Hours Ahead)
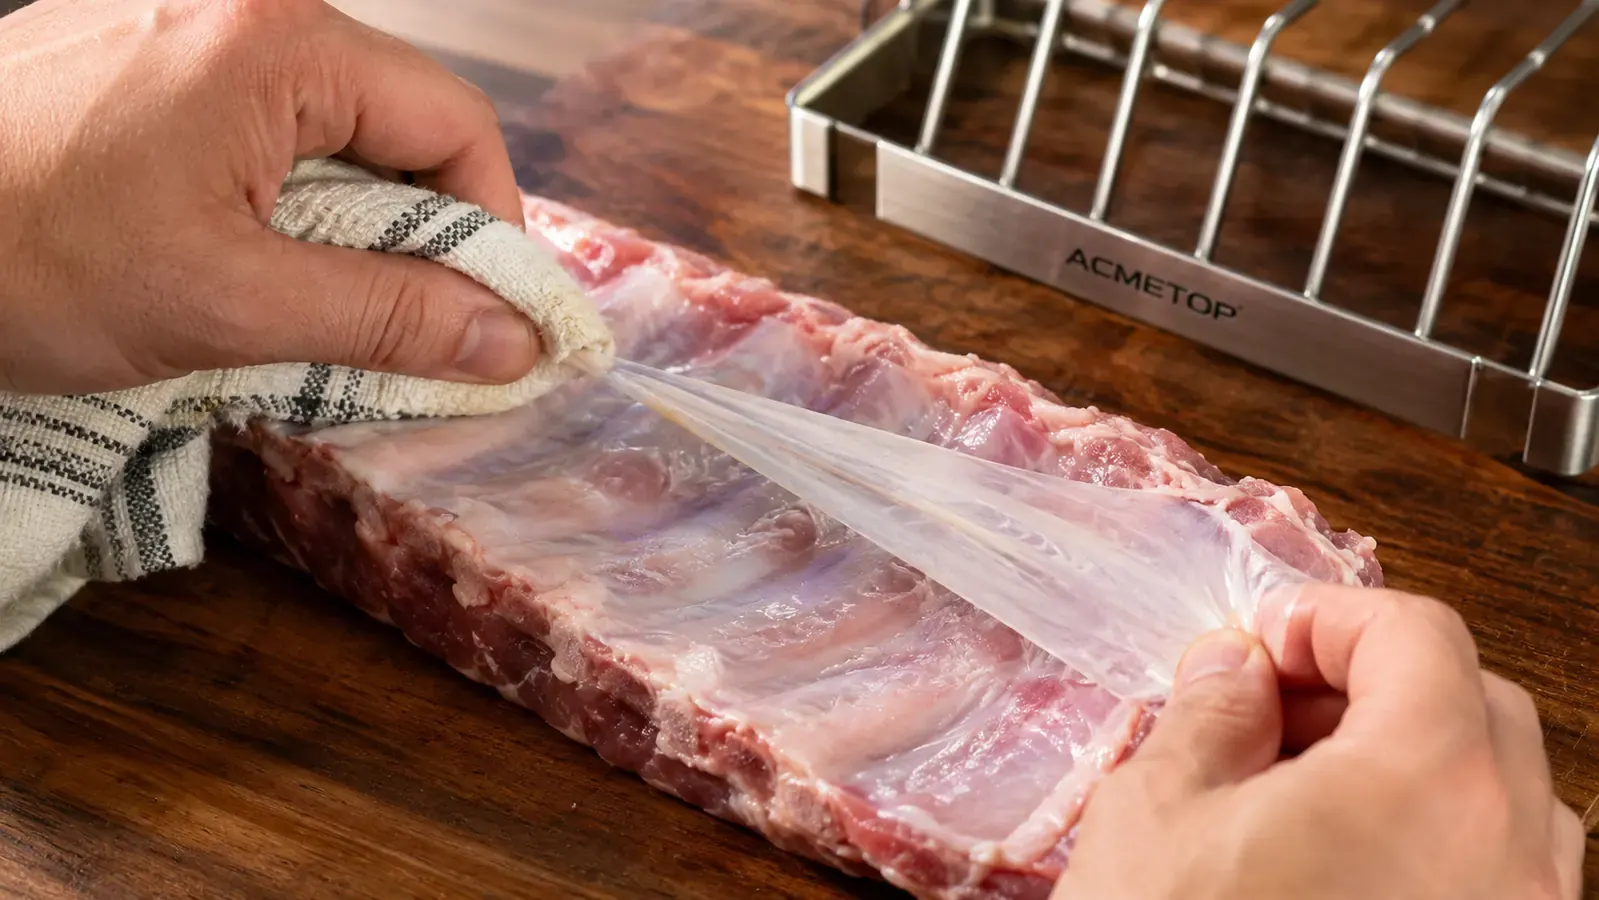
The most important prep step is one a lot of people skip: pulling the membrane off the back of the ribs. That thin, papery layer on the bone side is called the pleura or silverskin, and it blocks smoke and seasoning from penetrating the meat. Flip your rack bone-side up, slide a butter knife under the membrane near the center bone, and grab a corner with a dry paper towel for grip. It usually comes off in one piece once you get it started. If it tears, just work your fingers under the remaining sections and peel them away.
Once the membrane is gone, pat the ribs dry with paper towels and apply your dry rub generously on all sides. I use a simple mix of brown sugar, coarse black pepper, smoked paprika, garlic powder, onion powder, kosher salt, and a pinch of cayenne. The brown sugar helps form the bark you're going for. Press the rub in with your hands rather than sprinkling it on from high up. Wrap the seasoned racks in plastic wrap and refrigerate overnight, or at minimum for two hours. That rest time lets the salt draw moisture back into the surface and helps the bark develop a better crust on the grill.
One note on cuts: spare ribs (full slab, St. Louis style trimmed) and baby back ribs both work in an upright rib rack, but they cook differently. Baby backs are shorter and more curved, so they sit snugly in most racks and finish in about four to five hours at 250 degrees F. St. Louis-cut spare ribs are longer, meatier, and need five to six hours. Know which you have before you plan your timeline.
Step 2: Set Up Two-Zone or Indirect Heat on Your Grill
You cannot cook ribs properly over direct heat. At temperatures above 300 degrees F with flame directly below, the exterior burns before the connective tissue has time to break down, and you end up with tough, dry meat with a charred crust. What you need is indirect heat, where the ribs sit away from the fire and cook in the circulating hot air and smoke inside the closed lid. On a charcoal grill, push all your lit coals to one side of the grill and set the rib rack on the opposite side. On a gas grill, light only one side (or the outer burners on a three-burner grill) and place the rib rack over the unlit burners.
Your target temperature is 225 to 250 degrees F, measured at grate level near the rib rack, not at the dome thermometer. Dome thermometers typically read 25 to 50 degrees hotter than where the meat actually sits. If your grill has only a dome thermometer, aim for 275 degrees on the dome to hit roughly 250 at the grate. On charcoal, manage temperature by opening and closing your vents: more open means more air, higher temps; more closed means lower temps. On gas, use your burner knobs. Get the grill stable at your target temp before loading the rack. This takes about 15 minutes on gas and 20 to 25 minutes on charcoal.
If you want to smoke on a gas grill, you have options. You can use a cast-iron smoker box filled with wood chips placed directly over a lit burner, or you can wrap soaked wood chips in a foil pouch, poke a few holes in the top, and set it over a burner. For charcoal, simply add two to three chunks of wood directly onto the hot coals right before loading the ribs. Fruit woods like apple and cherry give a milder, slightly sweet smoke flavor that pairs naturally with pork. Hickory is stronger and more traditional for Texas-style ribs. Avoid mesquite for a long cook, since it becomes bitter over several hours.
Step 3: Load the Rib Rack and Get the Lid On
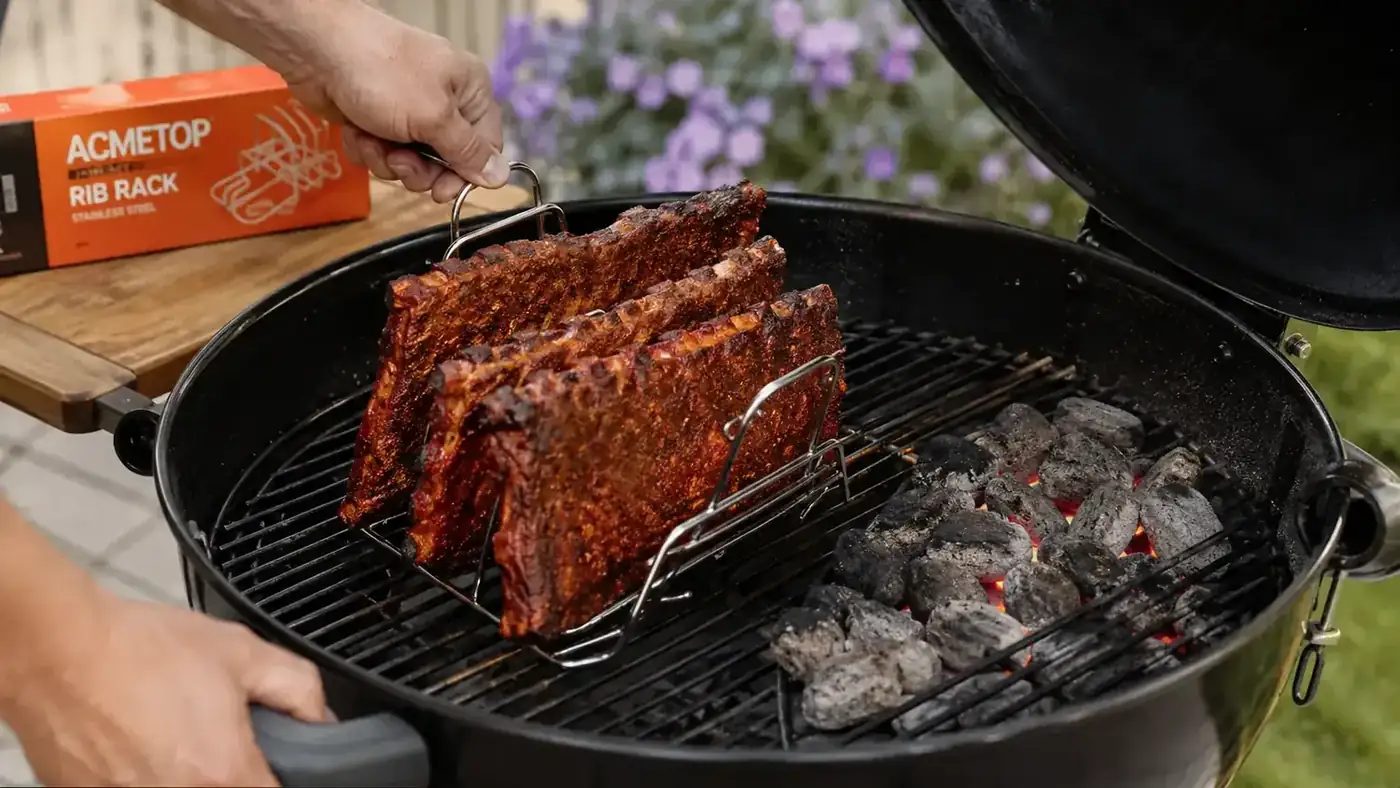
Take your rib rack out of the refrigerator about 30 minutes before cooking to let the surface come up toward room temperature. This is not strictly required, but cold meat placed on a warm grill can stall more aggressively and extend your cook time. Slide each rack of ribs, bone-side facing in, into the slots of the ACMETOP rib rack. The stainless steel slots are wide enough to handle both baby backs and St. Louis cuts. If a rack is slightly longer than the slot, arc it gently rather than forcing it straight. The curve is fine and does not affect cooking.
Set the loaded rib rack on the indirect side of your grill, centered as much as possible. Close the lid immediately and resist the urge to open it for the first 45 minutes. Every time you lift the lid, you lose heat and smoke, which extends your cook time and disrupts the smoke ring formation in the outer layer of meat. Position your grill's vent (on a kettle) or your exhaust vent (on a gas grill) above the rib rack. This draws smoke toward and over the meat before it exits, maximizing smoke contact.
Close the lid and leave it alone for the first 45 minutes. Every peek adds time and breaks the smoke ring you're trying to build.
Step 4: Spritz on a Schedule and Decide on the Wrap
Starting at the one-hour mark, I spritz my ribs every 45 minutes to an hour. My go-to spritz is half apple juice and half apple cider vinegar in a small spray bottle. The acidity in the vinegar tenderizes the surface slightly and helps the bark set to a deep mahogany color rather than going black. The apple juice adds a touch of sweetness without making things sticky at this stage. Give each exposed side two or three quick bursts from about eight inches away. You're not trying to soak the ribs; you're just adding a fine mist to keep the surface from drying out and cracking.
Around the two-and-a-half to three-hour mark on baby backs, or the three to three-and-a-half-hour mark on spare ribs, you'll face the wrap decision. Wrapping ribs in foil (the Texas Crutch) speeds up cooking, softens the bark, and produces very tender, nearly fall-off-the-bone meat. Skipping the wrap gives you a firmer bark and more pronounced smoke flavor, but adds an hour or more to your cook and demands more consistent temperature management. If you wrap, pull the ribs out of the rack, lay each one flat on a double sheet of heavy foil, add a few tablespoons of butter and a drizzle of honey, wrap tightly, and return them to the indirect side of the grill. Cook another 45 minutes to an hour wrapped, then unwrap for a final 30 to 45 minutes back in the rack to firm up the bark again.
If you skip the wrap, just keep spritzing on schedule and managing your grill temperature. No-wrap ribs need steady, consistent heat more than wrapped ribs do, because there's no foil buffer to hold in moisture. Check your charcoal every 90 minutes and add a half chimney of new coals as needed to maintain 225 to 250 degrees. On gas, the temperature manages itself as long as your propane tank has fuel.
Step 5: Check for Doneness, Rest, and Slice
The USDA recommends cooking pork ribs to an internal temperature of 145 degrees F for food safety, but that temperature produces ribs that are still tough and chewy because the collagen in the connective tissue has not yet converted to gelatin. For tender, pull-back ribs, you want an internal temperature of 195 to 203 degrees F. Use an instant-read thermometer between the bones, not touching the bone itself, which reads artificially high. That temperature range is when the collagen has broken down and the fat has rendered, which is what gives ribs their characteristic tenderness and moisture.
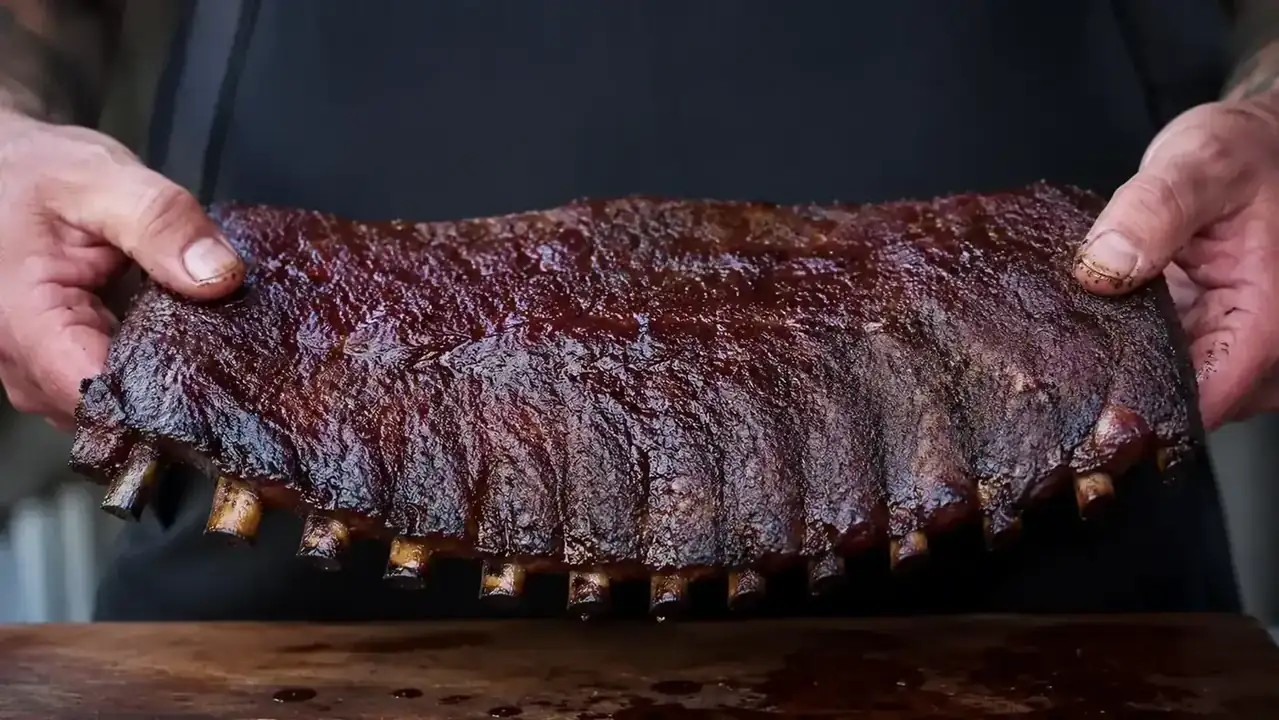
The bend test is a reliable backup check that does not require a thermometer. Pick up a rack with tongs at the center, holding it horizontally. If the rack bends significantly at both ends and small cracks appear in the bark on the top side, your ribs are done. If the rack stays fairly rigid, they need more time. A properly cooked rack of ribs should flex noticeably but not break apart when you pick it up this way. The meat should also have pulled back visibly from the tips of the bones by at least a quarter inch, though be careful with this one: it is a sign of doneness, but heavy spritzing can cause some pullback on ribs that are not yet fully tender.
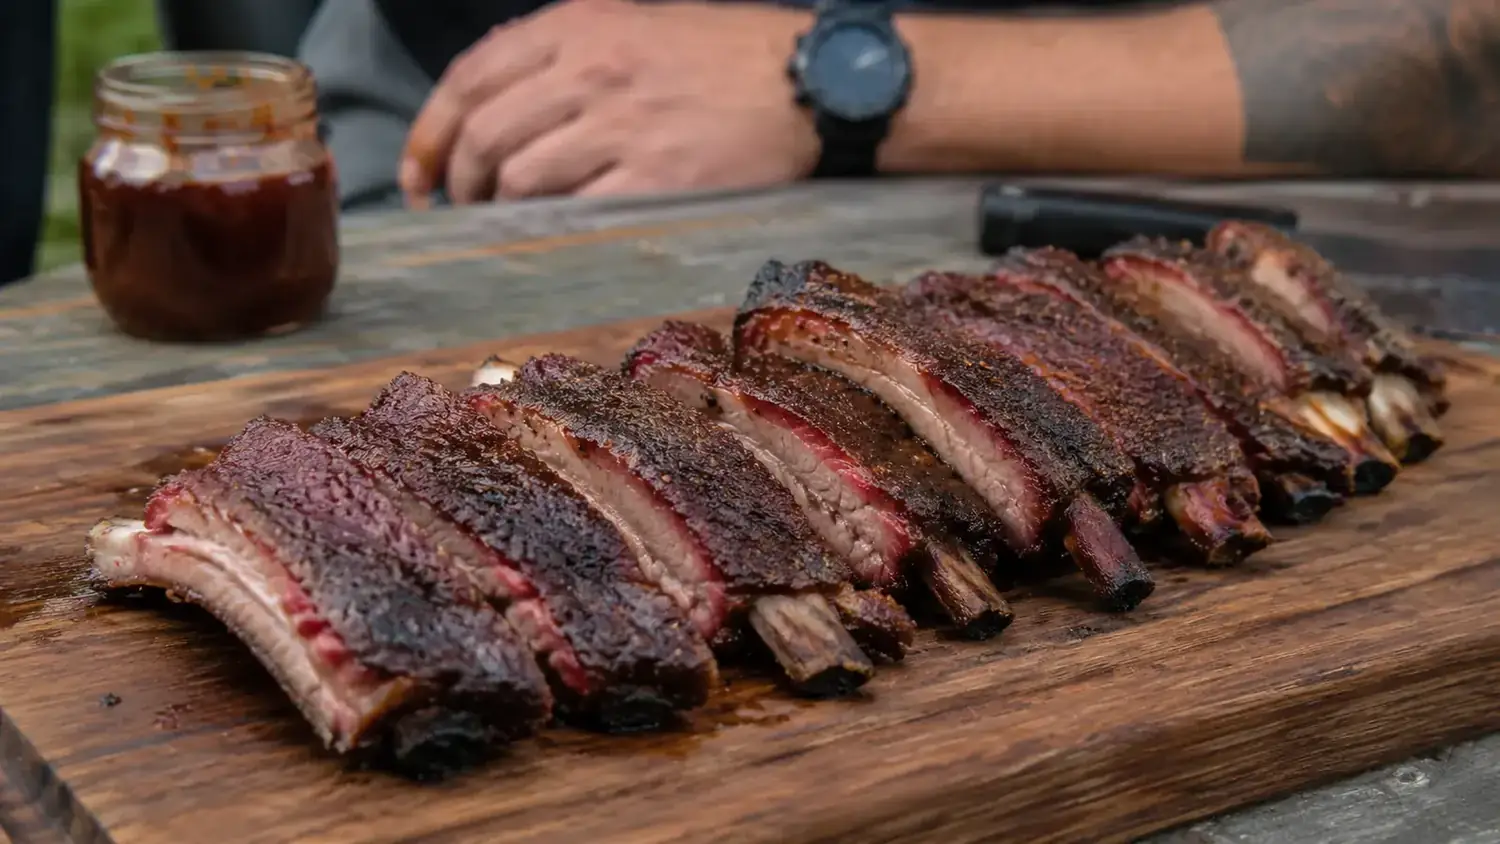
Once your ribs are done, rest them for at least 15 minutes before slicing. This is not optional. Resting lets the muscle fibers relax and reabsorb the juices that moved toward the surface during cooking. Slice between the bones with a sharp chef's knife, cutting bone-side up so you can see the bones as a cutting guide. Serve immediately, or hold in a foil-covered pan in a 170-degree oven for up to an hour without quality loss.
What Else Helps
A decent instant-read thermometer is the single biggest confidence booster for new rib cooks. The bend test and visual pullback are good crosschecks, but nothing replaces knowing the actual internal temperature. Beyond the thermometer, a pair of long silicone BBQ gloves makes rotating and removing a hot rib rack from the grill much easier and safer. The ACMETOP rack gets genuinely hot after hours at temperature, and bare-hand contact with the steel is not a good idea. If your grill tends to run hot on one side, rotate the rib rack 180 degrees at the halfway point to even out the cook. And if you are on a gas grill and your smoke wood burns out in the first 90 minutes, that is completely normal. The smoke ring forms mainly in the first two hours of cooking, so the later hours are just about low-and-slow heat.
If you want to dig deeper into the case for upright cooking and how the ACMETOP rack specifically holds up over an entire season, the full long-term rib rack review covers the details on fit, cleanup, and whether the welded joints hold after repeated use. And if you are on the fence about whether a rib rack beats the classic foil-flat method altogether, the 10 reasons a rib rack beats flat-on-the-grate lays out the practical case side by side.
Ready to fit three full racks on a 22-inch grill and cook them all at once?
The ACMETOP Extra Long Stainless Steel Rib Rack is the tool this guide was built around. It holds up to three full racks upright, cleans easily, and fits most standard kettle and mid-size gas grills without modification.
Amazon Check Today's Price on Amazon →